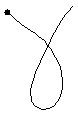
This is a tutorial for the quill program. quill helps designers of a pen-based user interfaces create good gestures for their interfaces. A gesture is a mark made with a pen or stylus that causes the computer to perform an action. For example, if you were editing text, you might use the following gesture to delete a word:
In this tutorial, you will learn how to use quill to:
Enter gestures
Recognize gestures
Edit collections of gestures
Organize gestures
Test recognizability of your gestures
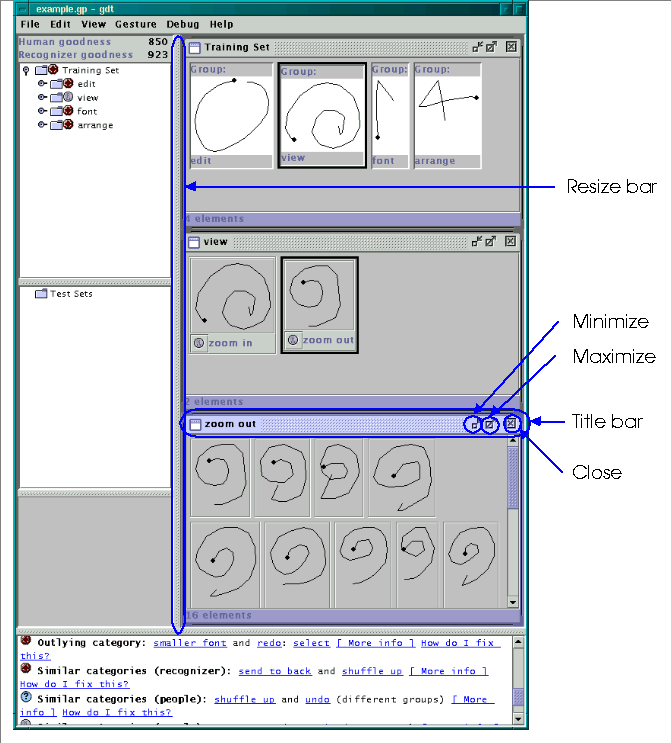
The diagram below shows the quill main window and highlights its main areas:
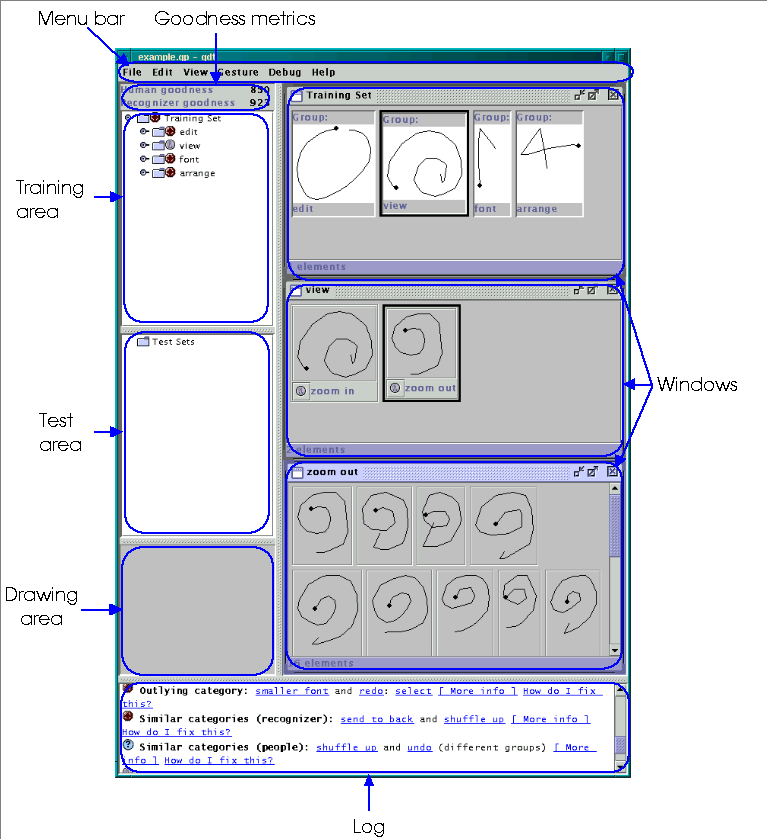
Figure:
Annotated Main window.
The remainder of the tutorial will show you how to do tasks with quill. It starts with the simplest, most basic tasks and then describes more advanced features you can take advantage of.
In your interface, you want the computer to recognize different gestures for each operation. For example, you may want to use gestures for the cut, copy, and paste operations. To be able to recognize gestures, the recognizer needs many examples of each type of gesture. The collection of examples for one type of gesture is a gesture category. You usually want to enter 10 to 15 example gestures for each gesture category. A collection of gesture categories is a gesture set.
Once gestures have been entered, quill gives the designer suggestions on improving the gestures so that the computer can recognize them more easily and so they are easier to learn and remember.
This section will lead you through an example of using quill to create gesture categories for the editing commands "cut", "copy", and "paste". Then it will show you how to recognize gestures.
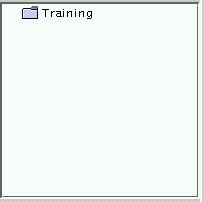
When you first start quill, the window will look like this:
![]()
Figure: Main window with an empty gesture package.
Initially, quill starts with an empty package. A package contains gesture information for one application. It includes a training set, which is a special gesture set that is used to train the recognizer. The training set is shown in the training area, and it may also appear in windows. A package may also contain one or more test sets, which are gesture sets that are used to test how well recognizable the training set is. Test sets are shown in the test area, and may also appear in windows. You can ignore test sets for now.
You can start to use quill by opening an existing gesture package, but for this tutorial we will create a new package.
First, create a new gesture category and name it, as follows:
Click on "Training" in the training area to select it
and select the menu item "Gesture/New Gesture Category" to create a new gesture category.
You will see that the training set now has the gesture category named "gesture1" in it. Select "gesture1" and type the name "cut" and press enter. The gesture category will be renamed to "cut".
Now you can begin to train the recognizer by adding training examples:
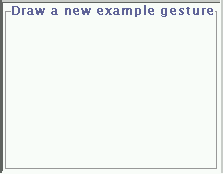
Create a new view of "cut" by either double-clicking on it or single-clicking on it and using the "View/New View" menu item. (Double-clicking with a pen is sometimes difficult.) A new window will open that looks like this:
![]()
This
window is where the training gestures for "cut" will be
displayed.
Now draw ten training gestures in the white gesture drawing area.
Draw 5 of them like this:
![]()
And
5 like this:
![]()
If
you draw a gesture you don't like, you can remove it by clicking on
it and executing the "Edit/Delete" menu item.
Drawing gesturesFor most written letters, numbers, symbols, etc., people don't care which direction you draw it in, as long as it looks correct. For example, you could draw the number "1" by starting at the top and moving your pen down, or starting at the bottom and moving it up, and it would be the same to people. The gesture recognizer does not see gestures this way. To it, which end you start at and the direction you draw in are important. For example, it would treat a "1" drawn top-to-bottom and a "1" drawn bottom-to-top differently. In quill, gestures are always drawn with a dot at the beginning. It is important that you draw gestures in the correct direction. |
Create a new gesture category the same way and name it "copy". When you the view for this gesture category, you will get another window with the new gesture category in it. You can move and resize the windows the same way that you move and resize desktop windows. (That is, move the windows by dragging their title bars, and resize them by dragging their corners.)
Draw 5 gestures for the copy gesture that look something like this:

and
5 like this:

Create another gesture category called "paste" and draw 5 gestures that look something like this:

and
5 like this:
![]()
Sometimes it's useful to see an overview of your gestures.
Click on "Training" in the training area.
Execute the menu item "View/New View". You should see a new window that shows the gesture categories (and groups) in the training set.

A
thumbnail view of the gesture categories in the training set.
Gesture viewsYou can create as many views of a gesture set, gesture group, or gesture category as you want. For example, if a gesture set has a lot of categories and groups in it, you could make two views of it to see the ones at the beginning and the ones at the end at the same time. |
Now that you have a training set, you can recognize gestures
Select the training set by clicking on "Training" in the training area.
Draw a gesture in the drawing area.
The program will pause briefly while the recognizer is being trained, then it will recognize your gesture. (It is possible that the recognizer will not be able to train. If that happens, try drawing more gestures for each of the gesture categories.)
The recognized gesture category will be displayed in the log at the bottom of the window and will turn green in the training area. (Only the most recently recognized gesture category will be green.)
Those are the basics of using quill. You may want to save your gesture package now, using "File/Save As..." from the menu. The rest of the tutorial describes other features of quill.
Gestures, gesture categories, and groups can all be edited using the standard editing commands other applications use: cut, copy, paste, and delete. You can select a object by clicking on it and then operate on it using the "Edit "menu or keyboard shortcuts (shown in the menu). You can select a range of objects by selecting the first or last one, and then holding down shift and clicking on the other end of the range. You can also toggle the selection of individual objects by holding down control and clicking.
If
you create new views in the right side of the window it may get
cluttered. You can move the windows by dragging on their title bars.
You can resize them by dragging their corners, or by clicking the
minimize or maximize buttons. You can close them with their close
boxes.
Also, you can resize the different parts of the main window by dragging on the gray separators between them.
Gesture categories are sufficient to make a set and have gestures be recognized. However, if you have many gesture categories it may be useful to group them based on their general type. For example, you might have gesture categories for edit operations (e.g., the ones you entered above) and others for file and formatting operations. quill allows you to organize your gesture categories by creating groups and putting gesture categories in them. (If you find it helpful, you can think of it like folders or directories in file systems.)
To create a group, use the "Gesture/New Group" menu item. You can rename it the same way you rename a gesture category.
Here is an example of using groups with the gesture categories you made earlier in the tutorial:
Select the training set by clicking on "Training" in the tree.
Create a new group with the "Gesture/New Group" menu item.
Select the new group and type "Edit" to rename it.
Select the first gesture category.
Shift-click on the last gesture category to select all the gesture categories.
Cut the gesture categories with the "Edit/Cut" menu item.
Select the group you created ("Edit").
Paste the gesture categories with the "Edit/Paste" menu item.
You now have a group containing gesture categories.
You can see how well your gestures can be recognized by drawing gestures one-at-a-time, like you did above in the Recognizing Gestures section. However, it is tedious to keep drawing the same gestures over again. Instead, you can create a test set, and use it to test the recognizability of your training set. You probably want to draw gestures in the test set that you think should be recognized, and you can then test them and see if they are recognized. If they aren't, you might want to edit your training set.
You use the "Gesture/New test set" menu item to create new test sets, and add gestures to the set the same way you add them to the training set.
You can create test sets this way:
Execute the "Gesture/New Test Set" menu item. You should see a new test set appear in the test window, named "testset1".
If you want to, rename "testset1" by clicking on it, typing its new name, and pressing enter.
Click the expansion icon left of the folder icon to show the groups and categories inside the test set.
Expand the "Edit" group the same way.
Double click (or use "View/New view") on "Cut" to make a new view.
Draw ten test gesture in the gesture drawing area. Make them look like the "Cut" gesture, but make some of them sloppy.
If you want, add test gestures to the other gesture categories ("Copy" and "Paste").
Click on the test set ("testset1", or whatever you have renamed it to if you renamed it) in the test set window to select it.
Execute the "Gesture/Test recognition" menu item. The log will tell you if all the gestures in the test set were correctly recognized. If not, you can click on the "Misrecognized gesture" link to see which gestures were misrecognized.
The log, at the bottom of the main window, shows information about what the application is doing. Also, advice to you about your set may be displayed there.
Advice shown in the log comes in three different priority levels:
|
|
Informational. You do not need to take any action from this. |
|
|
Low-priority suggestion. There is something about your gestures that you may want to change. |
|
|
Medium-priority suggestion. The suggested change would probably improve your gesture set. |
|
|
High-priority suggestion. The suggested change would almost certainly improve your gesture set. |
Like in a web browser, text that is underlined and blue is a link, usually to an example, gesture, or group. Some links bring up the help window with relevant information.
quill evaluates your gestures and may give you suggestions in the log. quill also shows you a summary of how good it thinks your gestures are with two goodness metrics, displayed between the menu bar and the training area. One metric is for how good your gestures are in terms of humans, namely whether your gesture categories are different enough from each other that people will not be likely to get confused by them. (If they are in the same group, it's ok for them to be similar.) The other metric is how good your gestures are for the recognizer. The recognizer goodness metric goes down if you have training gestures that are misrecognized or extremely different from others in their category, or gesture categories that are too similar to each other. The maximum for both metrics is 1000. The higher the goodness value, the better quill thinks your gestures are.
If you have changed your gesture package but quill has not had time to analyze them, it puts a "?" after the goodness metrics. If you wait a short time, quill will analyze your gesture package and update the metrics.